
在线预览:astro-sify-demo.lazy-boy-acmer.cn | GitHub:santisify/astro-theme-sify
环境准备
确保已安装 Bun(推荐)或 Node.js 18+。
# 安装 Bun
curl -fsSL https://bun.sh/install | bash
创建项目
# 克隆项目
git clone https://github.com/santisify/astro-theme-sify.git my-blog
cd my-blog
bun install #如果是node环境 npm install
常用命令
# bun
bun dev          # 启动开发服务器 (localhost:4321)
bun run build    # 构建生产版本
bun preview      # 预览生产构建

# npm
npm run dev
npm run build
npm run preview
配置站点
编辑 src/consts.ts,修改站点基本信息:
export const SITE_TITLE = 'My Blog';
export const SITE_DESCRIPTION = '这是我的个人博客';
export const SITE_AUTHOR = 'Your Name';
export const SITE_URL = 'https://example.com';
export const SITE_AVATAR = '/avatar.png';
export const SITE_COVER = '/cover.jpg';
export const PAGE_SIZE = 10;
导航菜单
export const NAV_ITEMS = [
  { label: '首页', href: '/' },
  { label: '周刊', href: '/weekly' },
  { label: '文章', href: '/archives' },
  { label: '友链', href: '/friends' },
  { label: '关于', href: '/about' },
];
社交链接
export const SOCIAL_LINKS = [
  { name: 'GitHub', href: 'https://github.com/yourname', icon: 'github' },
  { name: 'RSS', href: '/rss.xml', icon: 'rss' },
];
编写文章
在 src/content/blog/ 目录下创建 .md 或 .mdx 文件。
Frontmatter 字段
---
title: 文章标题          # 必填
description: 文章描述    # 可选
date: 2024-06-01         # 必填
tags: [标签1, 标签2]     # 可选,默认 []
category: 教程           # 可选
cover: https://example.com/cover.jpg  # 可选,支持远程 URL 或本地路径
series: 系列名称         # 可选,同系列文章自动归组
pinned: false            # 是否置顶
draft: false             # 是否为草稿(构建时过滤)
---
文章存放方式
支持两种目录结构:
src/content/blog/
├── my-post.md              # 单文件形式
└── my-post/
    ├── index.md            # 目录形式(推荐,可存放本地图片)
    ├── cover.webp          # 封面图
    └── images/             # 文章内图片
本地图片
使用相对路径引用本地图片:
cover: ./cover.webp图片路径会通过 src/pages/_imageStore.ts 自动解析。
配置评论
在 src/components/waline/Comment.astro 中配置 Waline 服务端地址:
const serverURL = 'https://your-waline-server.vercel.app';配置友链
编辑 public/links.json,添加好友链接:
{
  "friends": [
    {
      "id_name": "cf-links",
      "data": [
        {
          "name": "好友名称",
          "avatar": "https://example.com/avatar.png",
          "desc": "好友简介",
          "link": "https://example.com"
        }
      ]
    }
  ]
}
部署
Vercel
一键部署,无需额外配置。
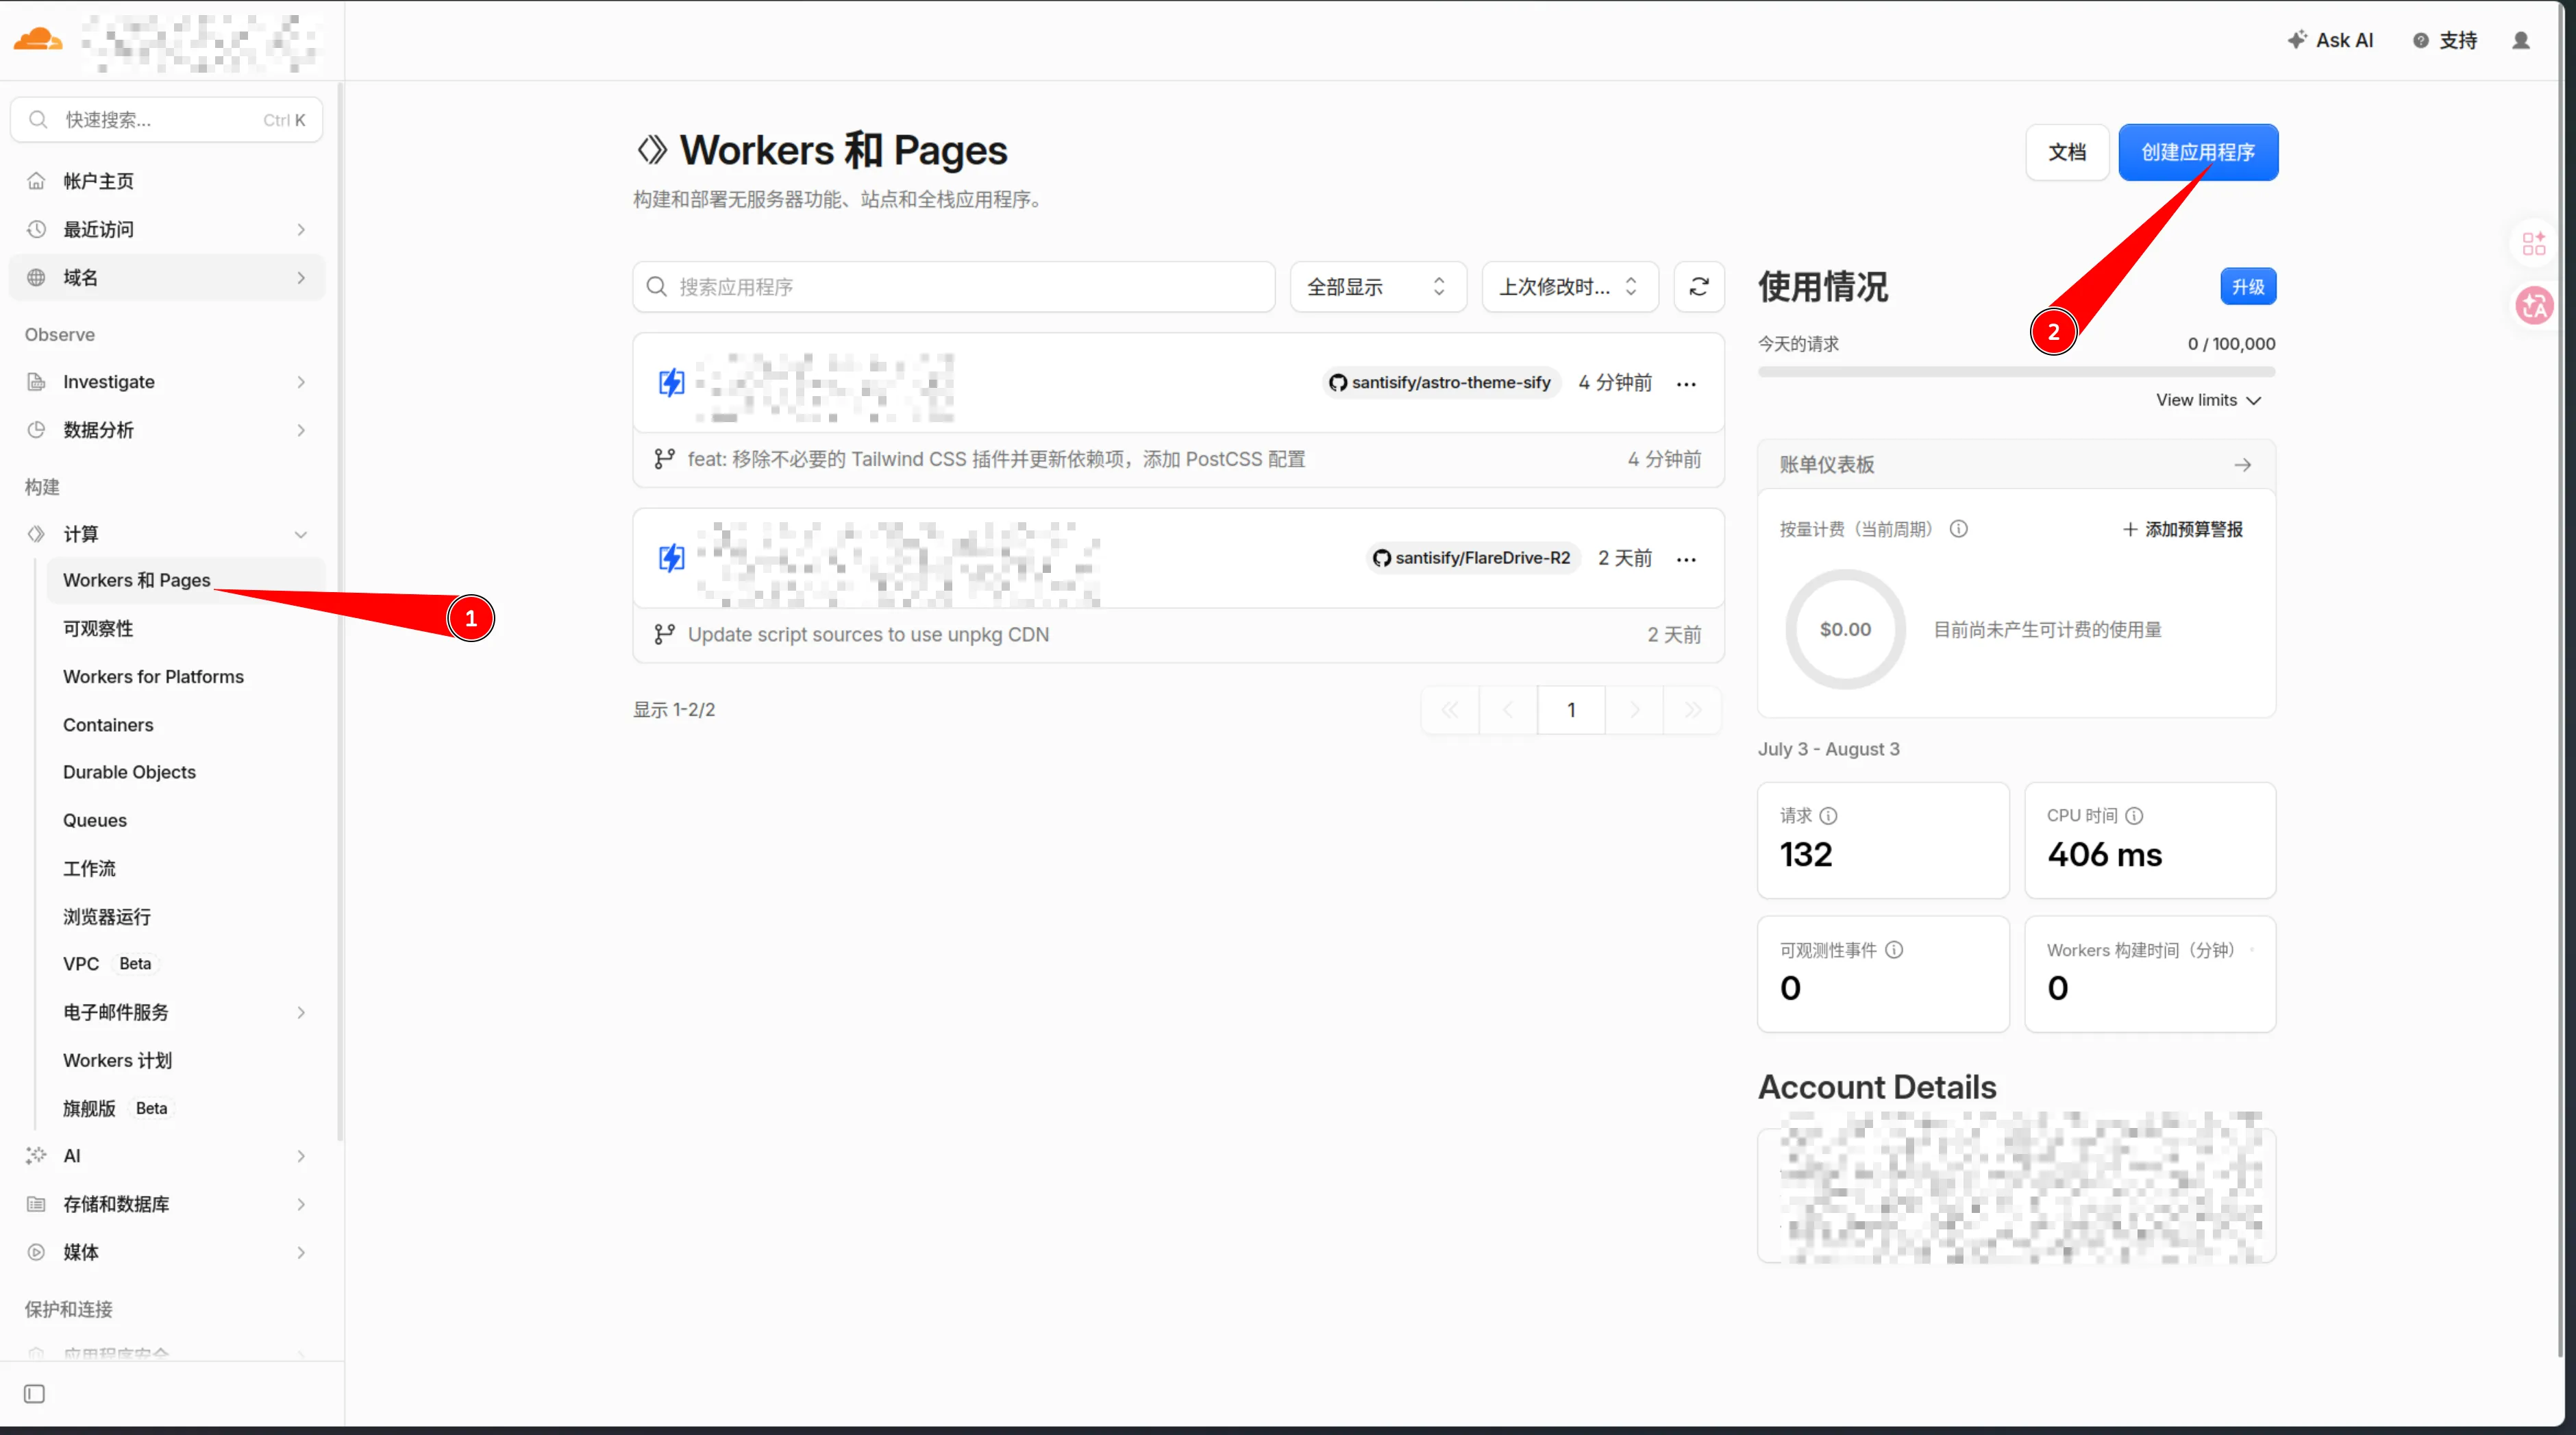
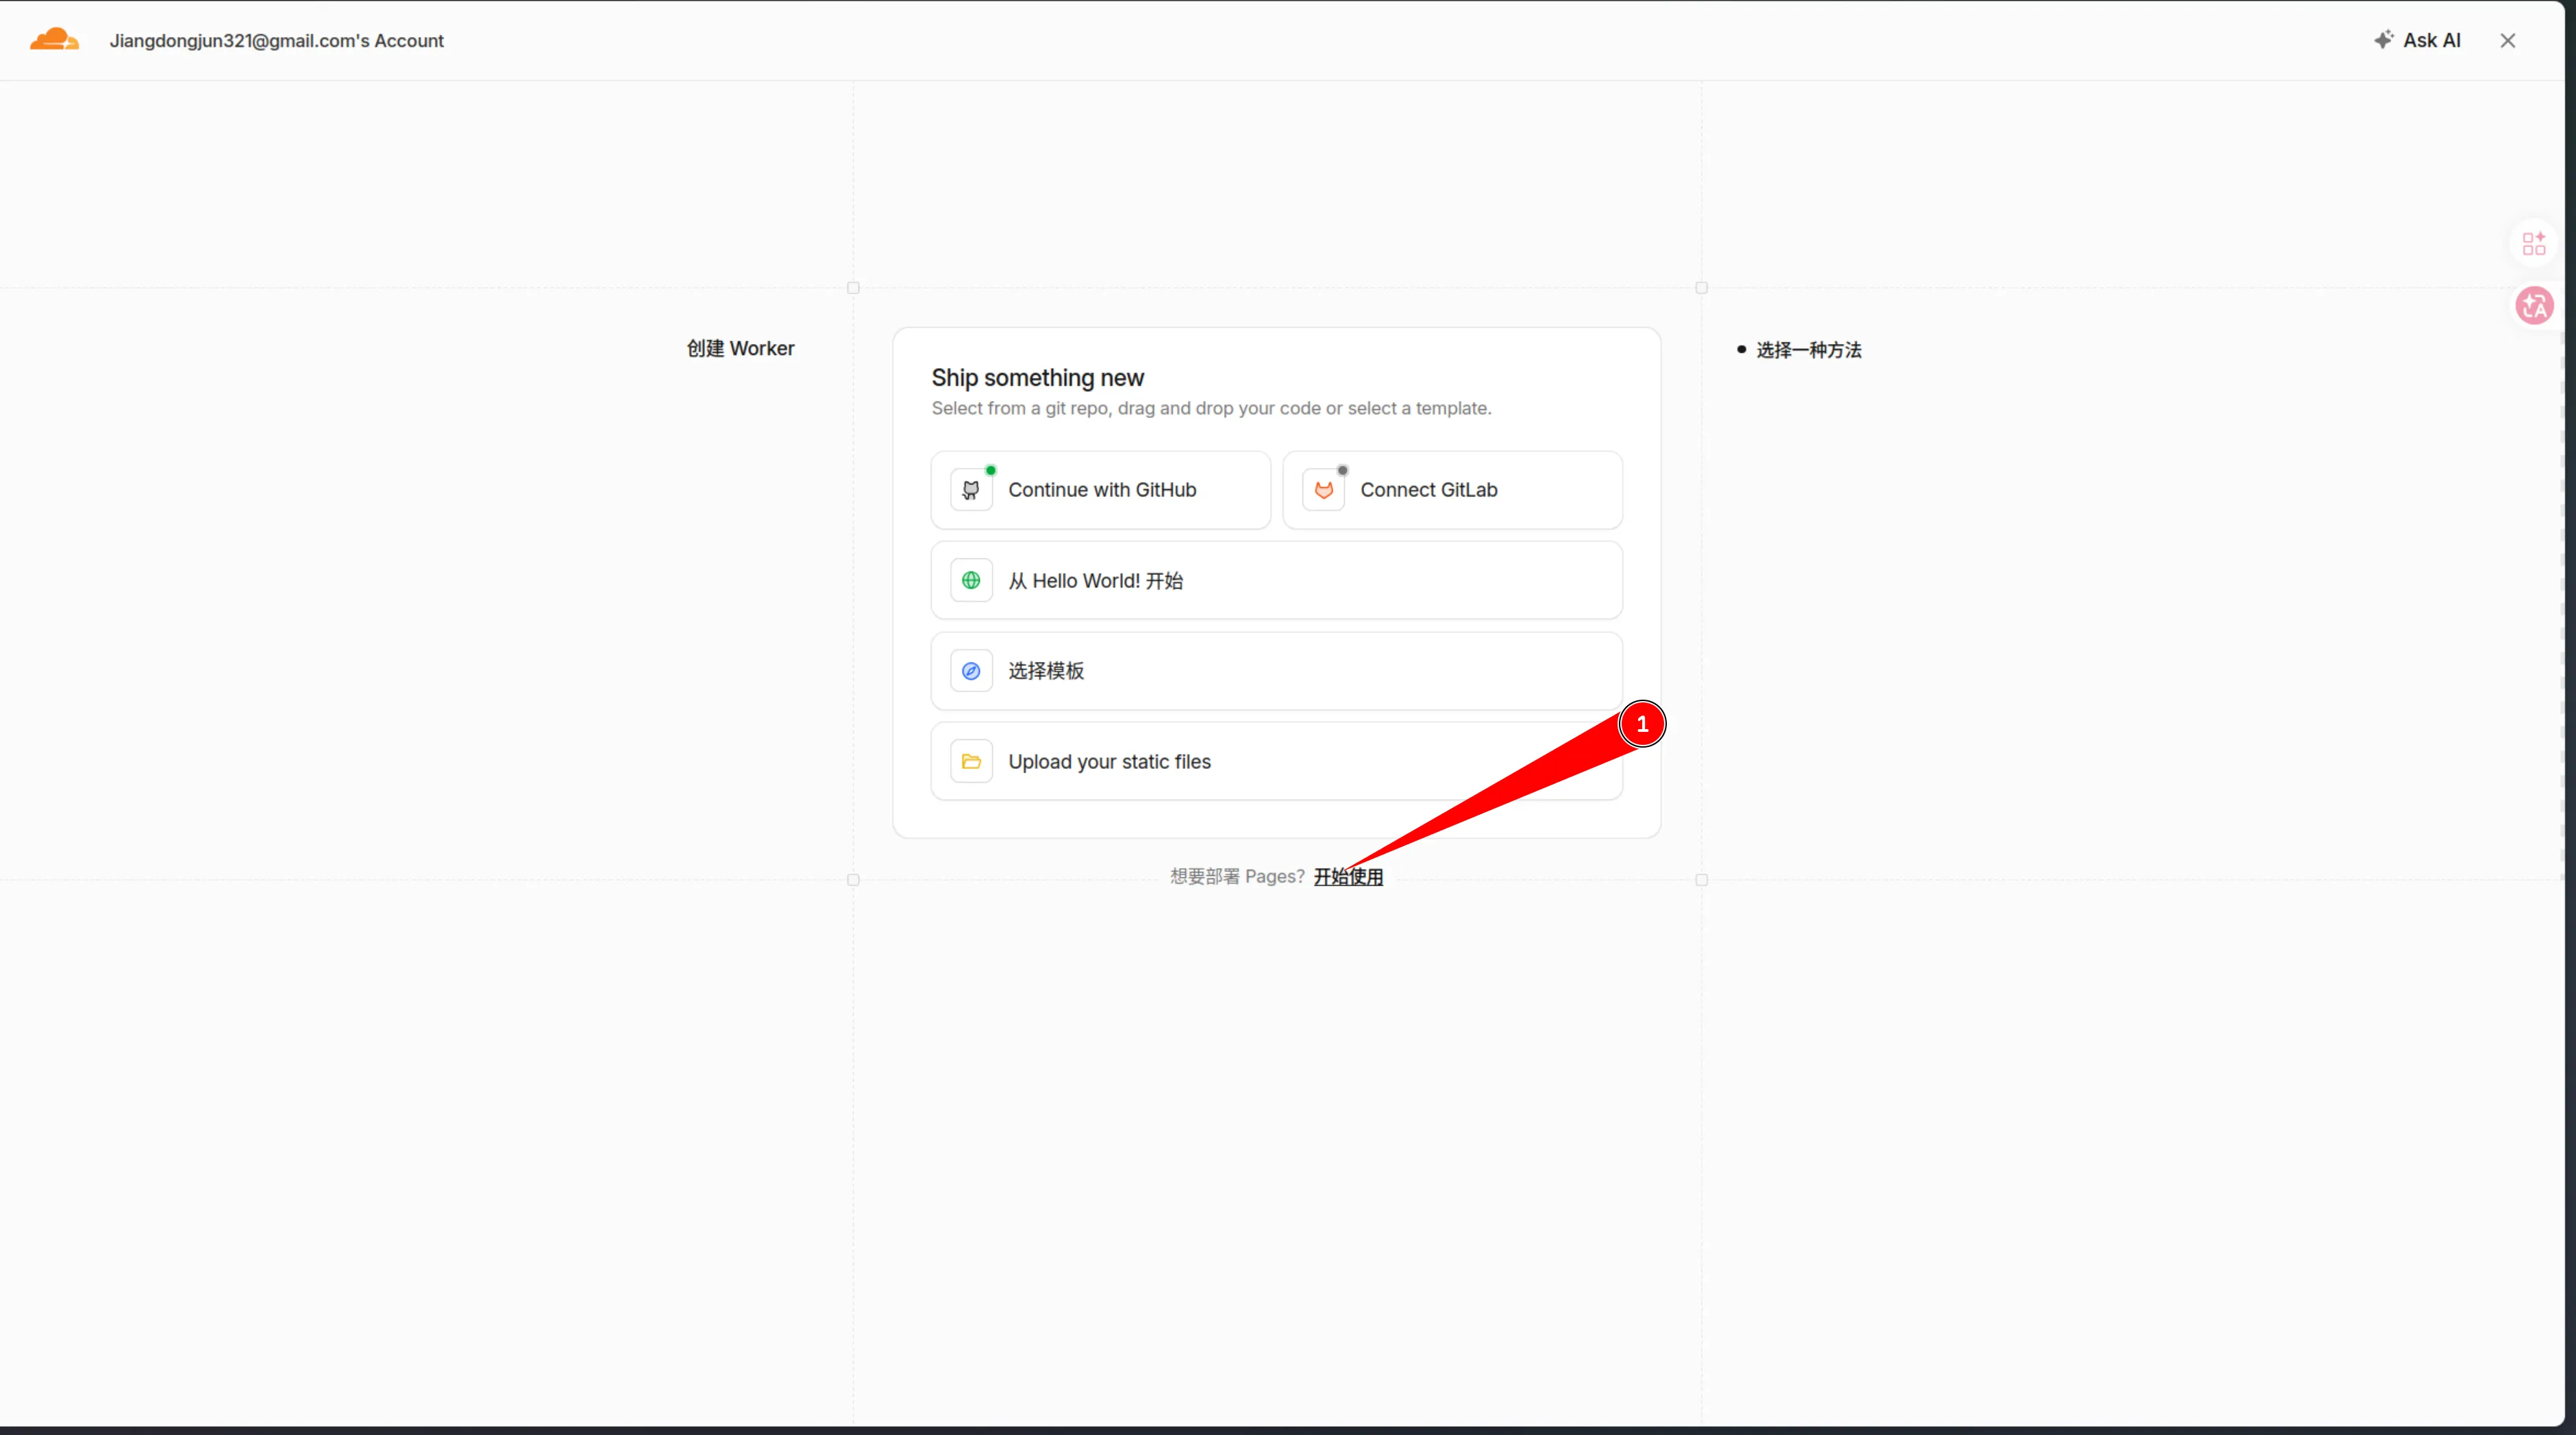
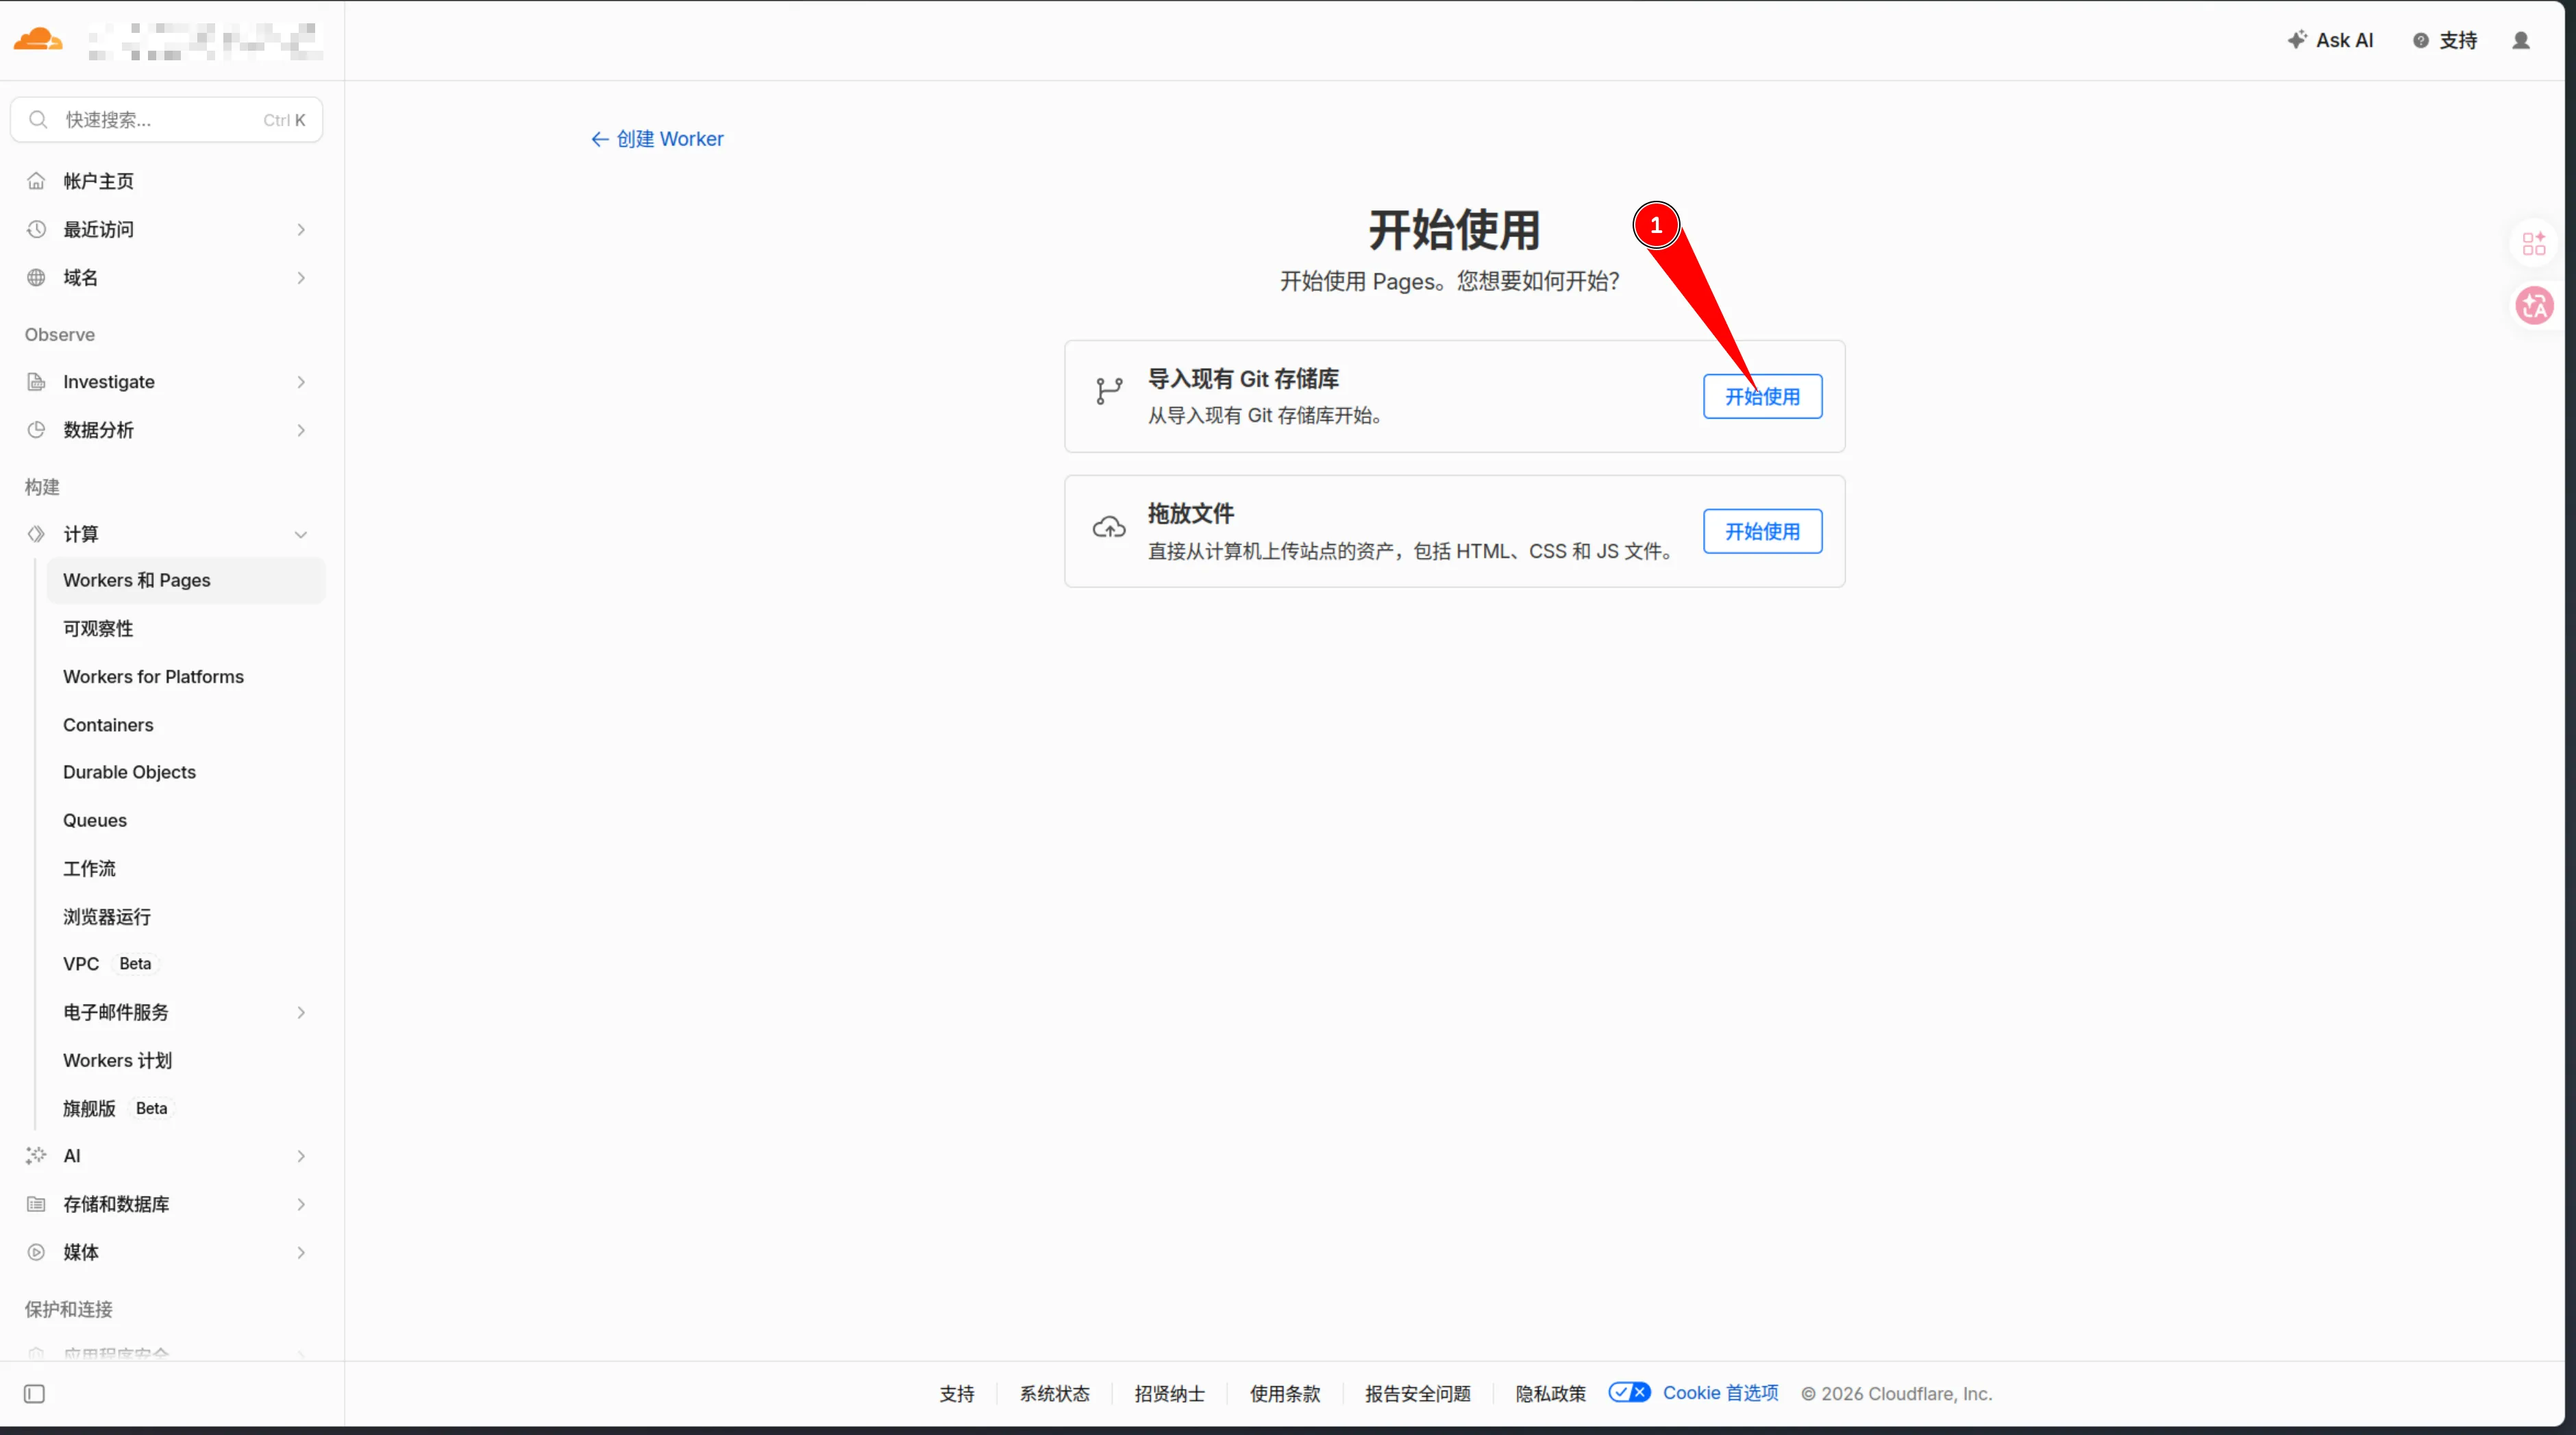
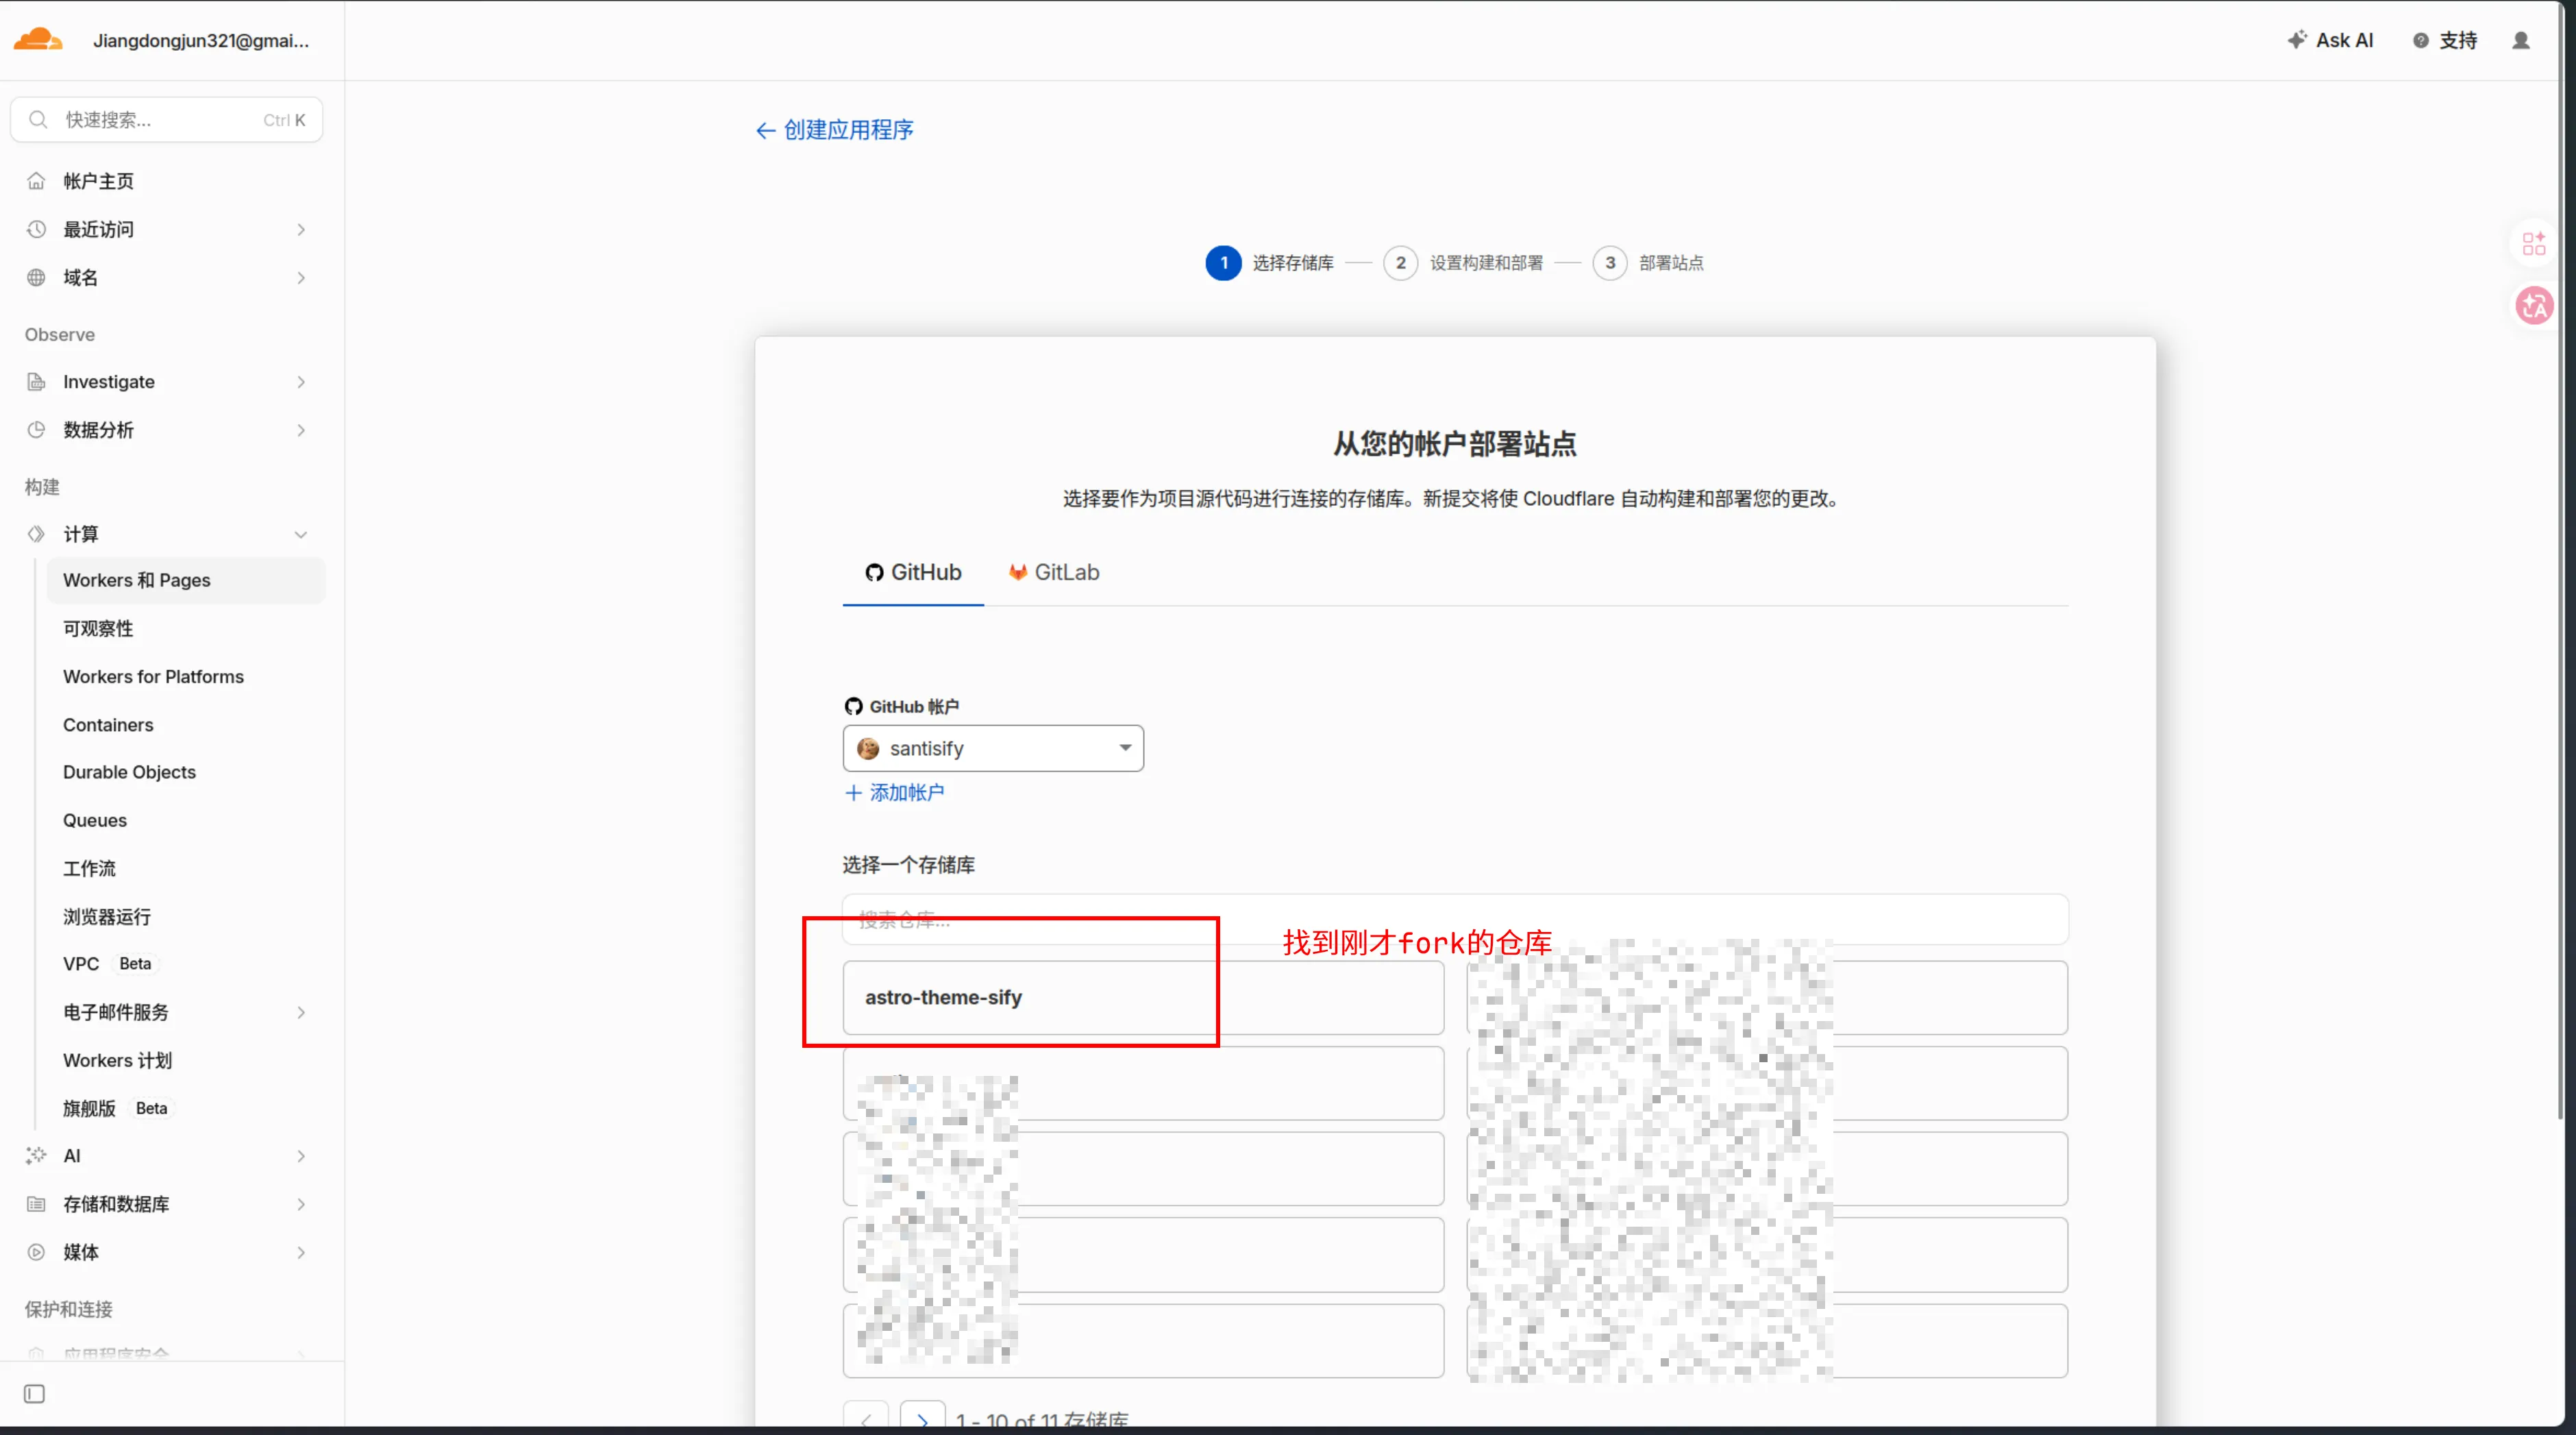
Cloudflare Pages
首先fork当前仓库到自己的github
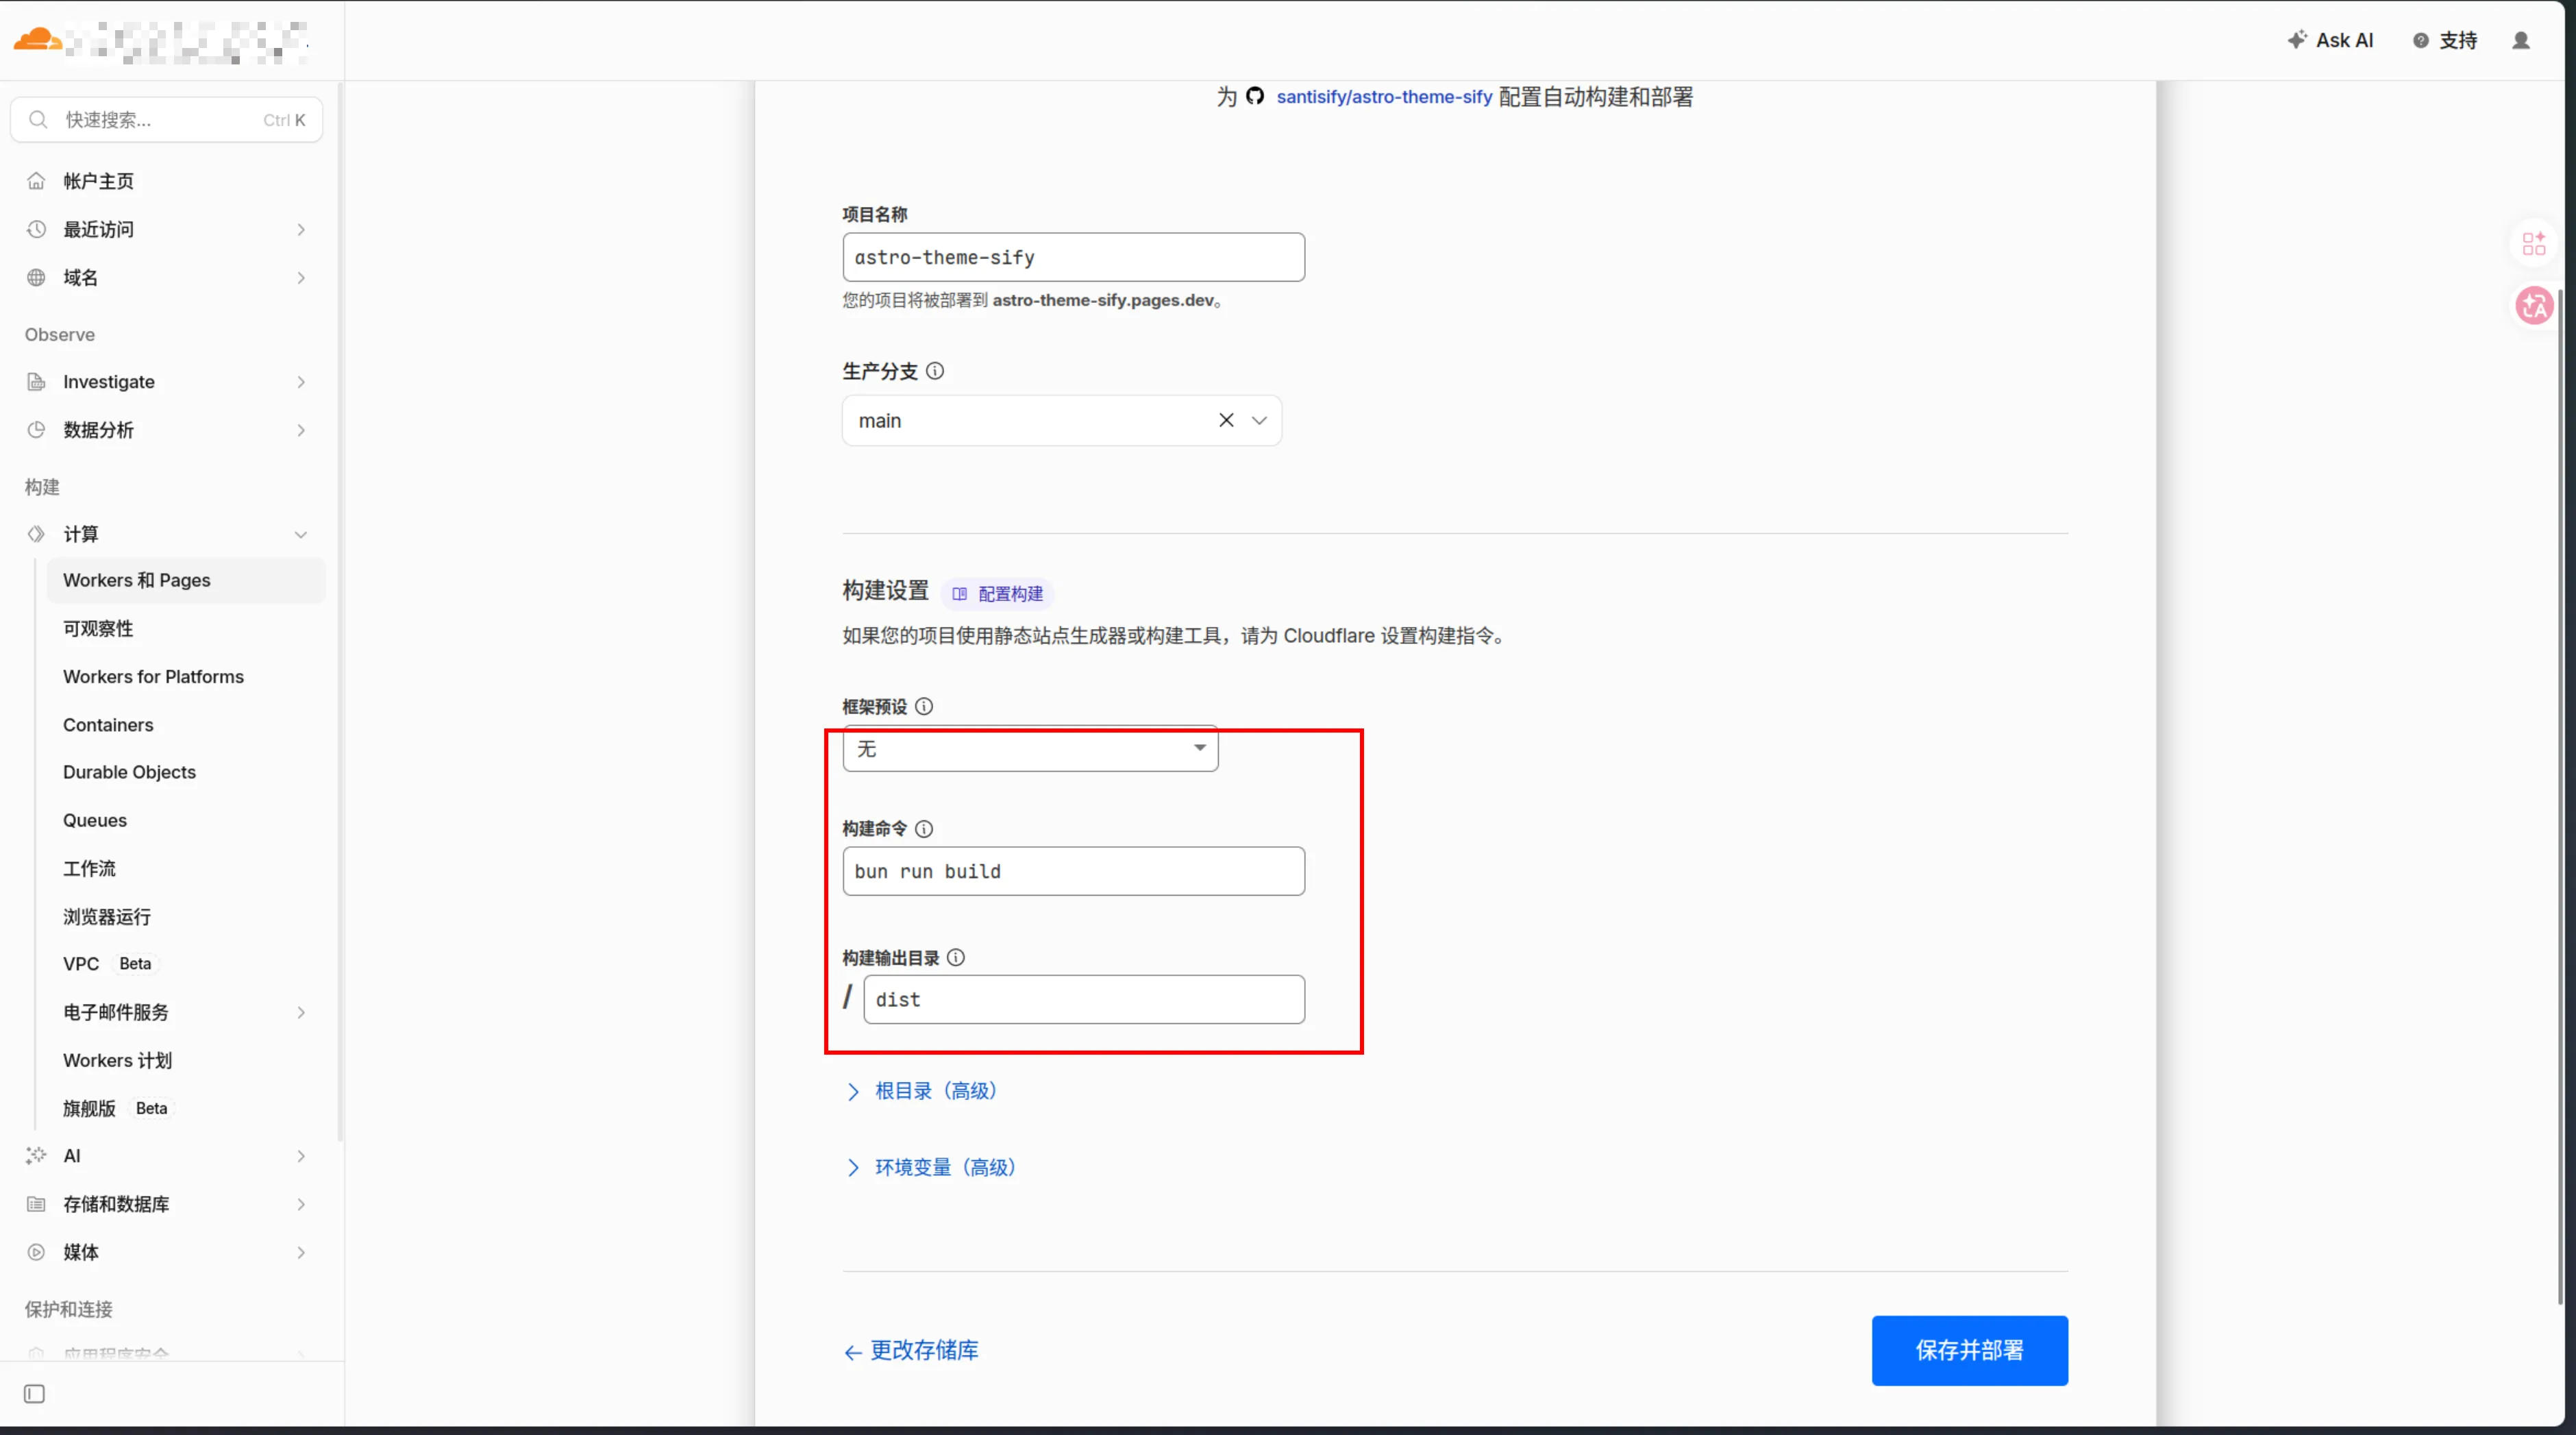
其他静态托管
在本地命令行运行bun install && bun run build
构建后直接将 dist/ 目录内容上传到任意静态文件服务器。
自定义主题
编辑 src/styles/global.css 中的 CSS 变量来自定义配色:
@theme {
  --color-primary: #e9536a;       /* 主色调 */
  --color-bg-light: #f5f5f5;      /* 浅色背景 */
  --color-bg-dark: #1a1a2e;       /* 深色背景 */
  --color-card-light: #ffffff;    /* 浅色卡片 */
  --color-card-dark: #1e2a45;     /* 深色卡片 */
}
修改站点字体:
--font-family-sans: 'Inter', 'Noto Sans SC', sans-serif;
--font-family-mono: 'JetBrains Mono', 'Fira Code', monospace;